MilestonesConfiguration
Milestones Configuration
Milestones Setup:
It is possible to use milestones in Planning if certain products have sub routes or are manufactured with operations in different departments.
Milestones are managed in the Products>Milestones menu

This is where milestones are set up and configured. The milestone marked in Green is the milestone that is used as the main reference in the Planning platform.
Planning will be based on operations associated to this operation when accounting for delivery dates.
Choosing which milestone to be the main reference point is done in the settings.
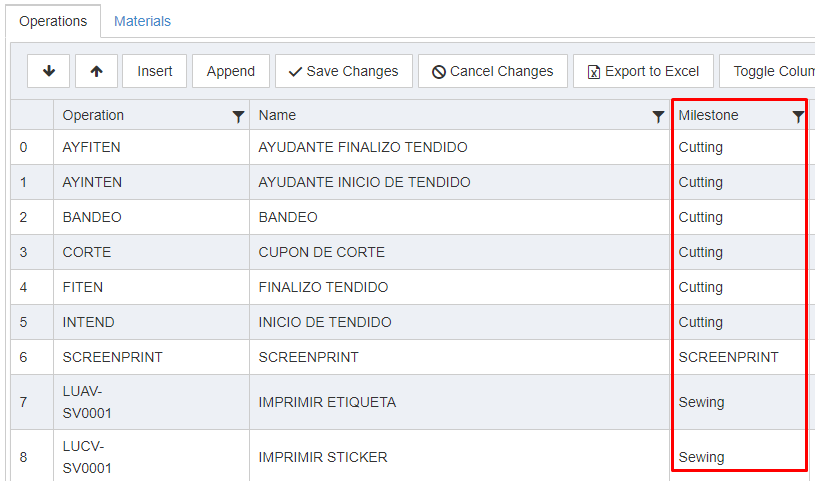
For this to function properly product operations must also be assigned Milestones correctly.
This is done in the Manage>Products menu in the Product Bill of Labor

Configuring Departments with Milestones
For this to migrate over to the planning platform, milestones must be associated to departments.
There are two different ways to do this depending on the department structure and how the planning is desired to function.
Alternative 1:
The most simple and common way to do this is to associate departments directly to a specific milestone.
Using this alternative only allows a single milestone to be associated to a single department.
Setting up milestones this way is suitable for less complex manufacturing where the Shopfloor departments are seen as the actual sewing lines.
This is done through the Manage>Locations>Departments Menu.
Clicking edit unlocks the field and will allow selection of a single milestone - In this example Department ES31 has the Milestone Sewing.

Alternative 2:
With larger departments using several sub departments, such as in cases where a department can be a whole plant the manufacturing can be more complex.
Multiple milestones might be finished in a single departments, or within the sub departments.
To use this alternative the Planning Period must first be set up - please see Planning Periods and configure this before setting up.
Setting up milestones this way is done through the Planning View
Planning-Planning-Planning Period Details


After getting to the planning view for the period of which the milestones are to be set up all departments will be shown.
Each department will need to be configured separately.

To access the department configuration click the calendar button next to the desired department.
This will bring up the configuration window where the department milestones can be set up.


Here the department capacity is set up together with the associated milestone.
This is how a department can be configured to have several milestones at once in the planning view.
By setting up two time periods for the department with the same dates, their weekly standard hours, factor, and increment; but with different milestones.
If we for example do both Cutting and Sewing at El Salvador 32 it can be configured like this.
In this example we have 3200 available hours per week for cutting, and 21100 available hours per week for Sewing.

To continue configuring the Shopfloor Planning Platform:
Please see the optional Divisions and Categories filter configuration
Or continue to configuring Contracts
Copyright © 2020 by Aptean. All rights reserved.
Created with the Personal Edition of HelpNDoc: Easy to use tool to create HTML Help files and Help web sites