QuickstartguidetoPlanning
Quickstart guide to Planning
After having configured all prerequisites for the Shopfloor Planning Platform we can access the main Planning View.
This view will be populated by all products within the contracts connected to the Planning Period we are viewing.
We access the planning view for a specific Planning Period by clicking the details button.
This will bring up the planning view.

After having set everything up in the configuration guide this is how the main planning view will look.
We will see our products in the contract, our departments and their capacity, the traits associated to the products/departments as well as a table of the time period.
In this example we have a single contract with three different products each containing three separate delivery dates.


Filters, Settings, Functions
There are a few options and filters in this view that are good to understand before progressing further.
The top menu shows our different settings for this views as well as our filters.
Using the different filters can break the planning down into each department, single product categories and divisions.
Milestones can be used to see where different parts of the manufacturing is completed and when a milestone will be completed in the plan.

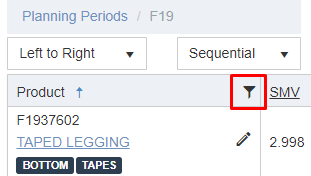
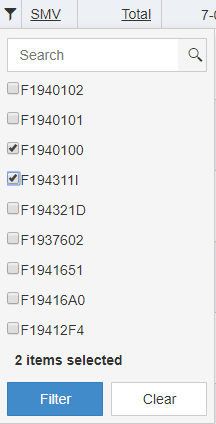
To filter by product the filter icon in the product list can be clicked.

This will expand a list of all products that exist within contracts in this planning period.
Multiple products be selected and this will filter out all other products.
When changing the other filters, such as department or product categories, this selection will stick.

The view settings define how things are displayed
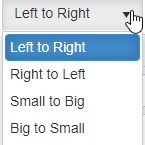
The default way the planning is laid out is to plan from left to right. There are however options to do it Right to Left
Small to Big, and Big to small are two other options that prioritize larger contracts first or last.

The way the planning is built is by default Sequential, the contracts with the earliest delivery dates will be planned first.
Following contracts will be planned to start after the first contract is finished.
This can also be set to plan contracts in parallel so that several contracts can be manufactured simultaneously if there is capacity.

Capacity can be displayed in three different ways, Standard Allowed Hours, Pieces or Dozens.
This will change the values in the whole view. The default option is Standard Allowed Hours.

The function buttons serve different purposes and also depend on the selection of fields in the planning table.
If no selection is made in the table these buttons will affect the entire planning table.
- Refresh button - refreshes the current selection
- Puzzle button - calculates and plans all unplanned products and contract lines.
- Clear page - clears the current selection
- Lock selection - locks the current selection from changes
- Unlock selection - unlocks the current selection for changes

Planning.
The top table shows all products contained in contracts within the planning period as well as their traits.
Same products in different contracts will show up as two separate rows.
SMV is the total SMV value for all product operations, in other words, the bill of labor.
Total is the accumulated SMV value - how this is displayed depends on the selection of SAH/Pcs/Doz.
The dates are showed grouped into days/weeks/bi-weekly depending on configuration.
Values of the total SAH/Pcs/Doz will be shown on the week of the delivery date in this table.
Pencil button can be clicked to open up and edit the contract deliveries, clicking the values with hyperlink will open up the specific contract where the delivery is contained.
Blue numbers are the total SAH to be completed for the specific delivery.
Red numbers are the total unplanned SAH of the specific delivery.

Clicking  will plan all unplanned deliveries. This will populate the planning table below
The green numbers in this table are the departments weekly capacity.
All these products were assigned to El Salvador 35 based on their traits and the available capacity.
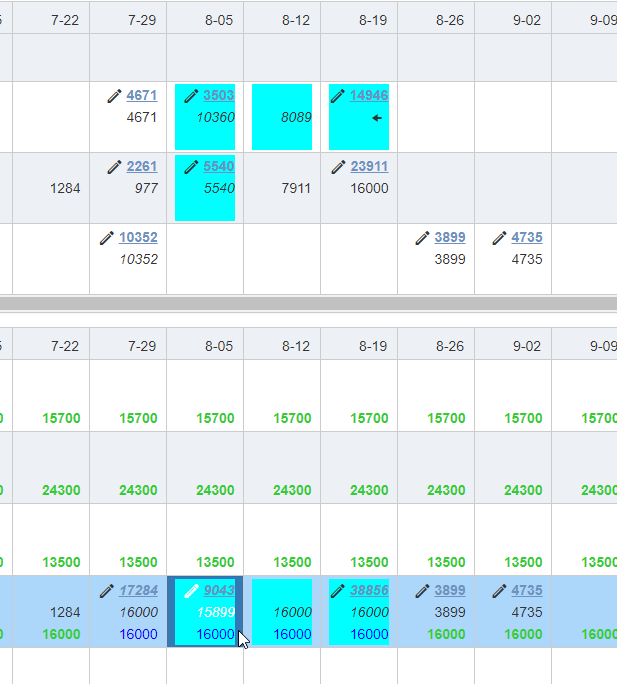
As we can see in the image, we will start producing these contracts the week of 7/22.

The top blue number shows the sum of the contract deliveries for the week.
Below this in black, the number of planned hours are shown.
The bottom number showing capacity changes color to blue when capacity is met.
Selecting a field in the planning table with allocated manufacturing will highlight all related contracts allowing pin pointing of which product is being produced when.
In this example we see that on the week of 8/5 production of the 3503h and 5540h contract will commence, however, manufacturing of the 14946h contract of 8/19 as well.
To be able to complete that delivery on time, manufacturing has been moved two weeks ahead of the delivery date. This is because we have another large delivery that week.

Copyright © 2020 by Aptean. All rights reserved.
Created with the Personal Edition of HelpNDoc: Transform Your CHM Help File Creation Process with HelpNDoc